Lost Lands 10 – Main Chapter | Part 1
Intro
Welcome to our walkthrough for Part 1 of the Main Chapter of “Lost Lands 10” from “FIVE-BN GAMES”. Someone pushed Susan the Warmaiden into the portal for the Lost Lands. Susan, now much older than in the days of her previous adventures, finds herself in front of a mysterious abandoned mansion. That is all that she knows so far, and she will find the terrible truth about what happened to her friends in the Lost Lands when she was absent.
Walkthrough
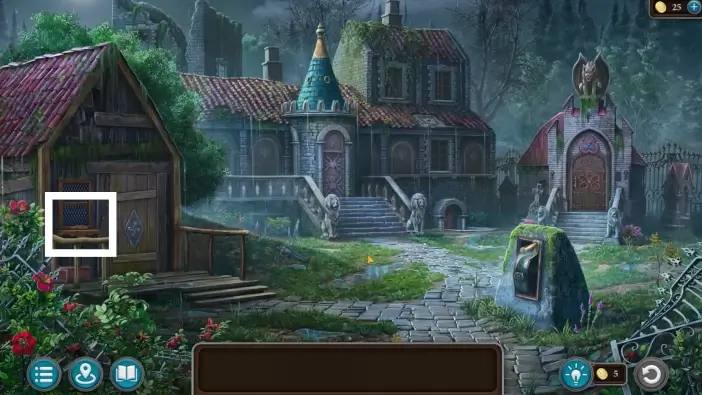
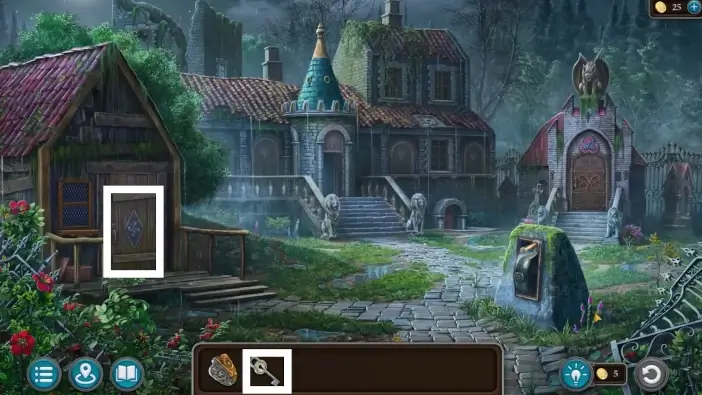
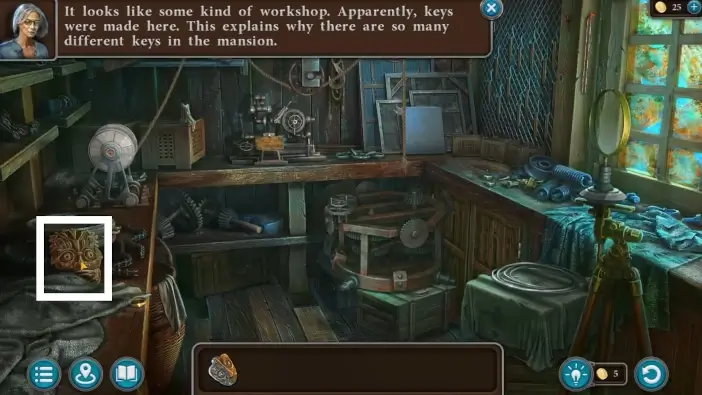
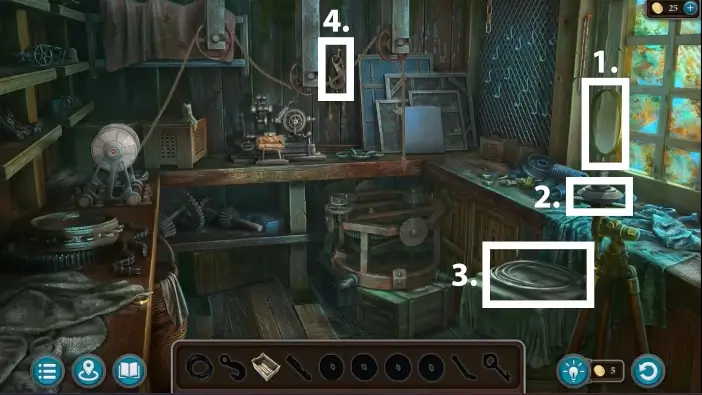
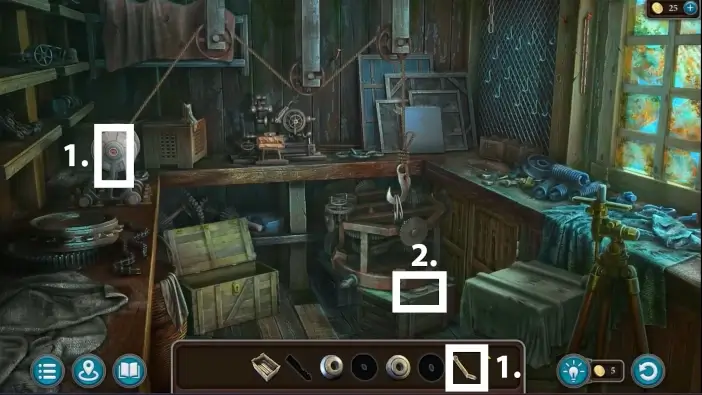
Approach the shed on the left. This is a workshop.
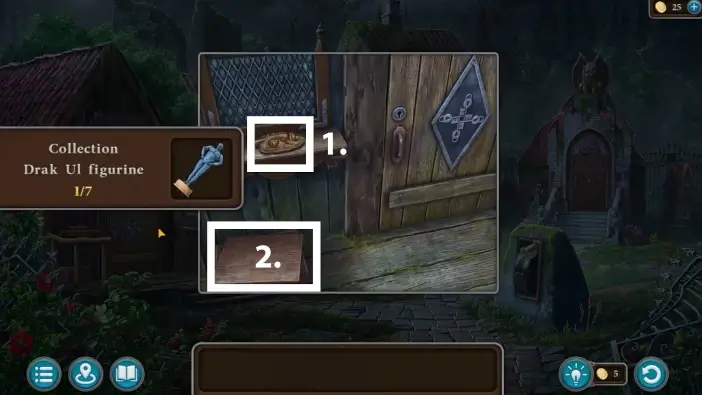
- Pick the first mask at the workshop’s window. You need to collect six masks to access the crypt later.
- Pick the octopus key inside the box. This key will unlock the mansion’s front door.
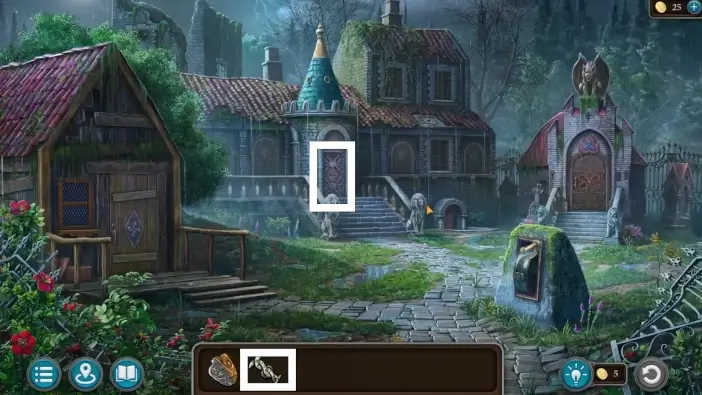
Approach the mansion’s front door and use the octopus key to open it. Enter the mansion.
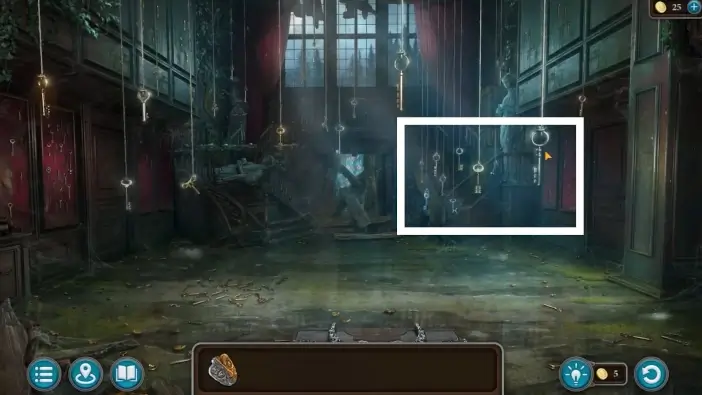
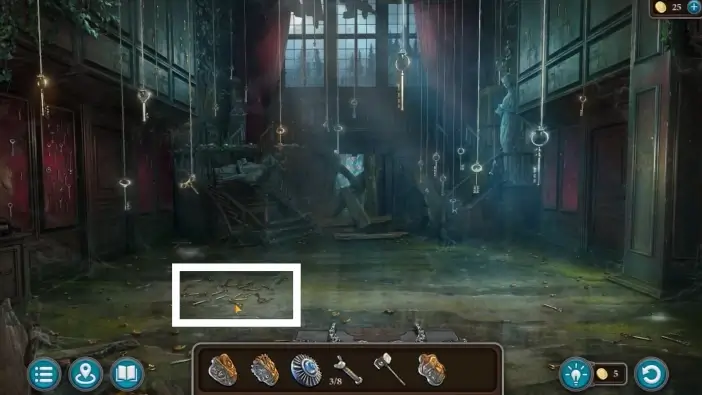
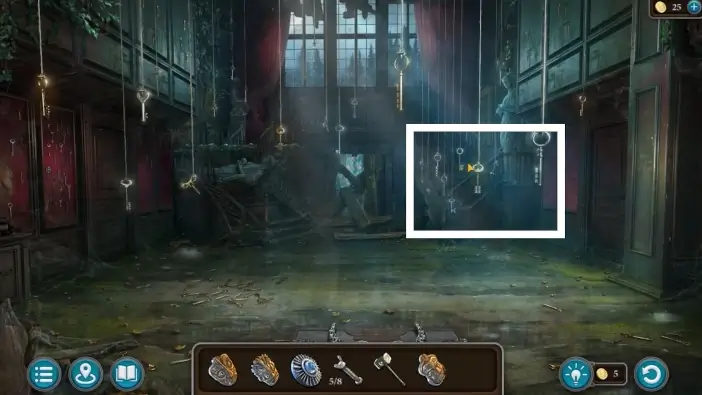
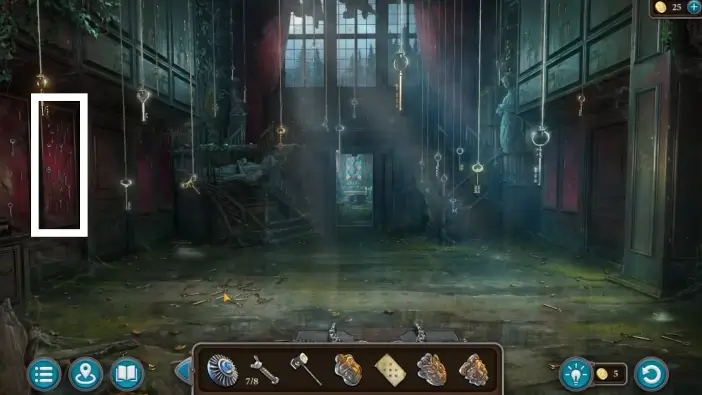
Approach the hanging keys on the right.
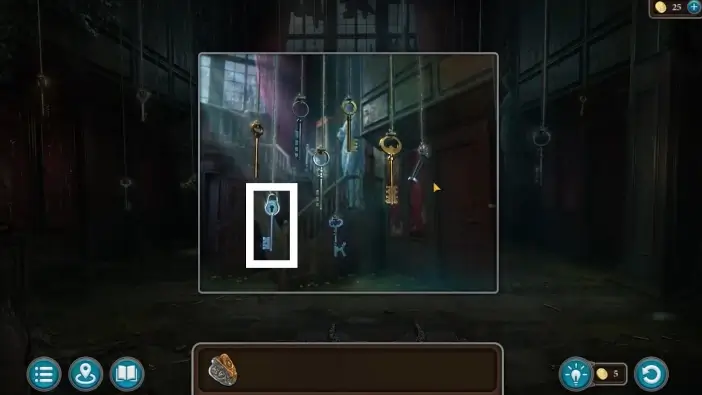
Pick the lower-left key. It is a key to the workshop.
Unlock the workshop’s door with the key you just got and enter the workshop.
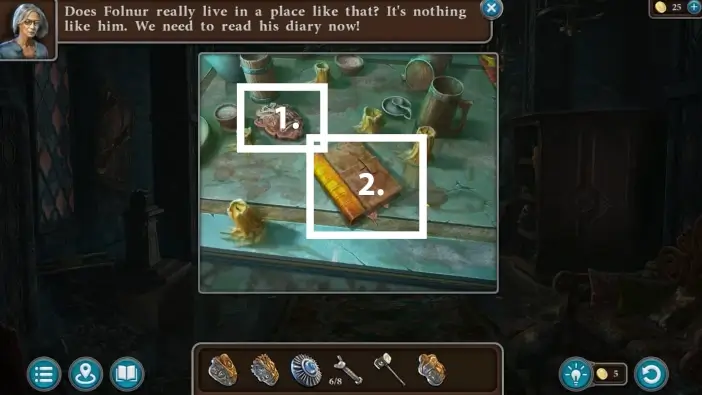
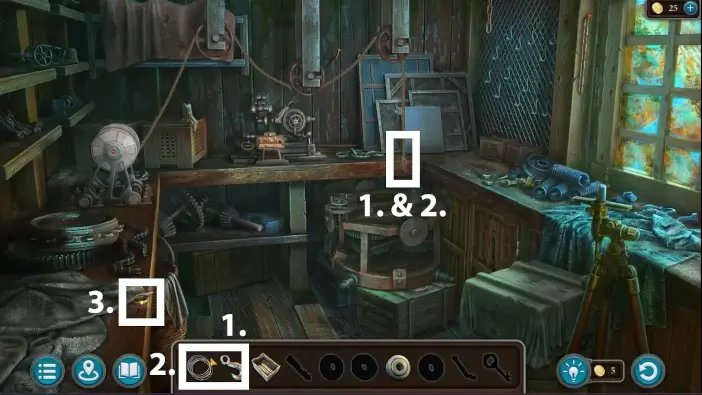
Pick the second mask from the table on the left.

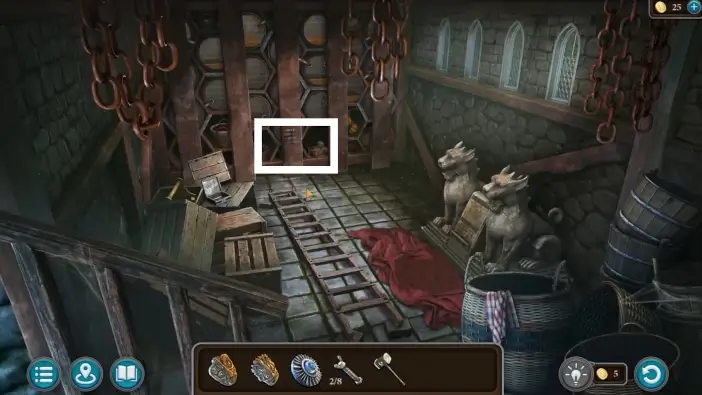
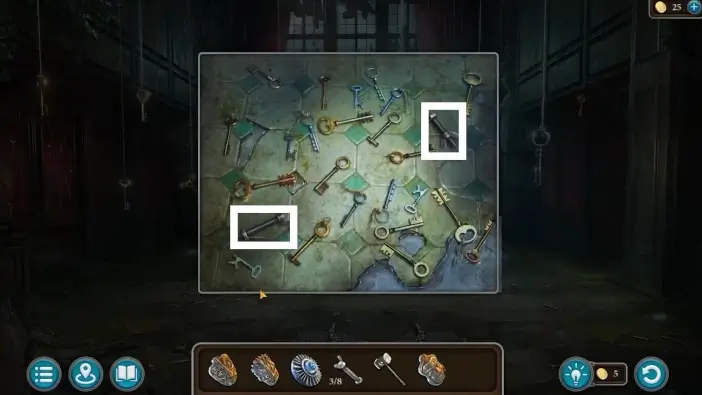
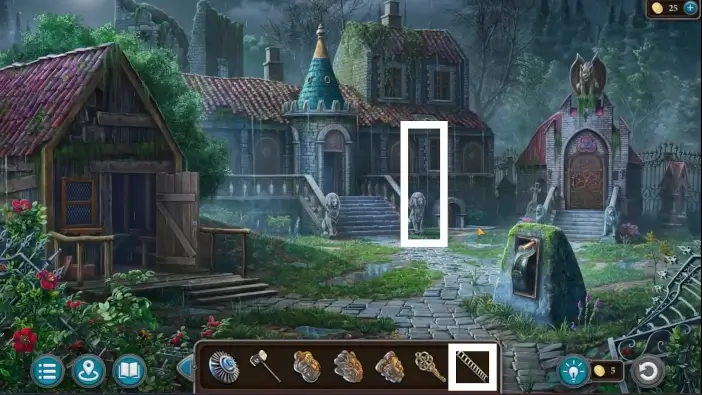
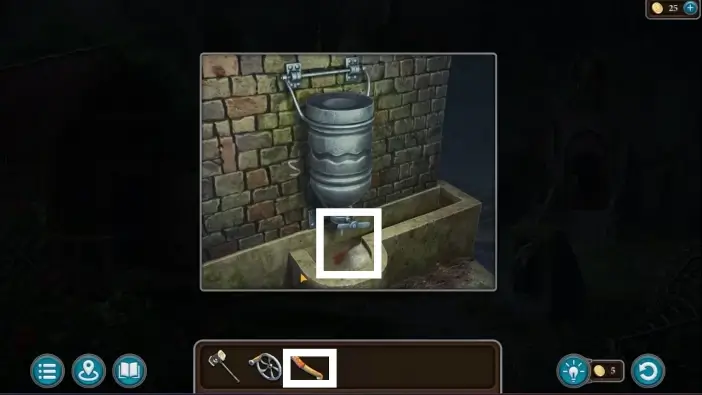
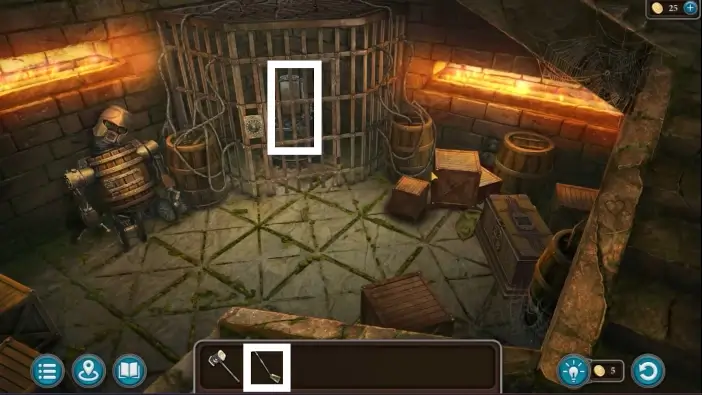
Return to the mansion and approach the keys lying on the floor.
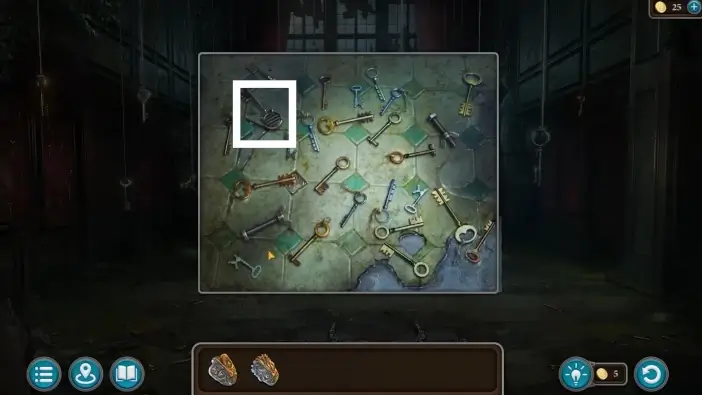
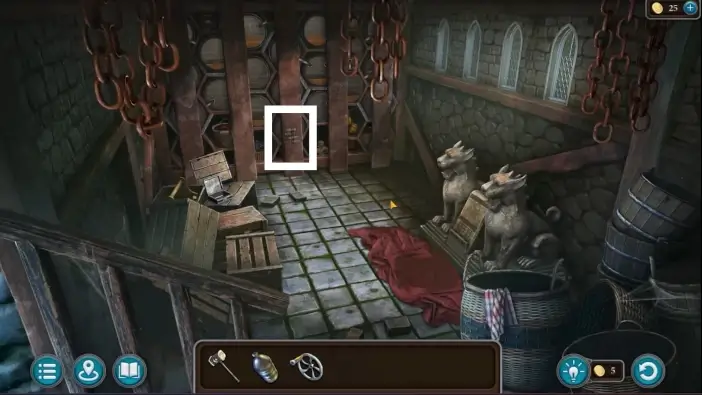
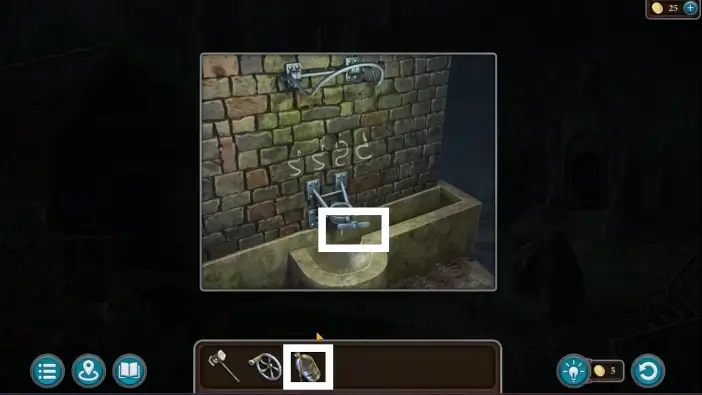
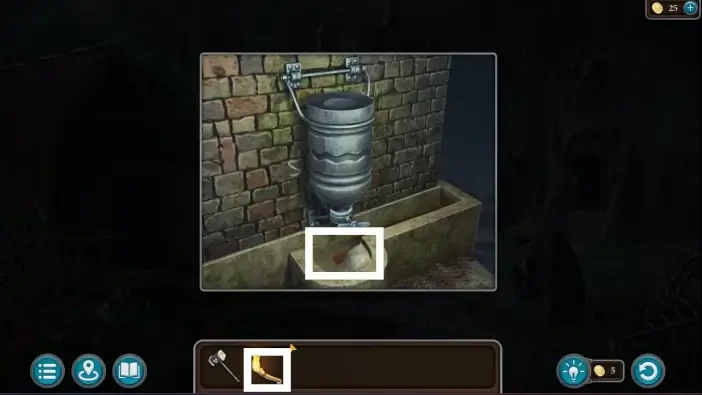
Pick the key that is marked in the picture above. It is a key to the mansion’s basement.
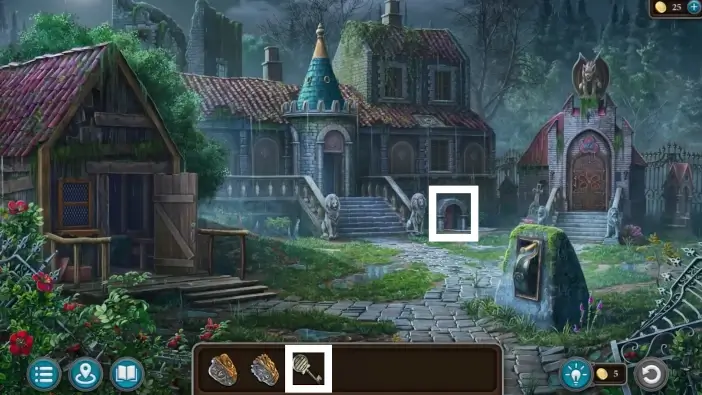
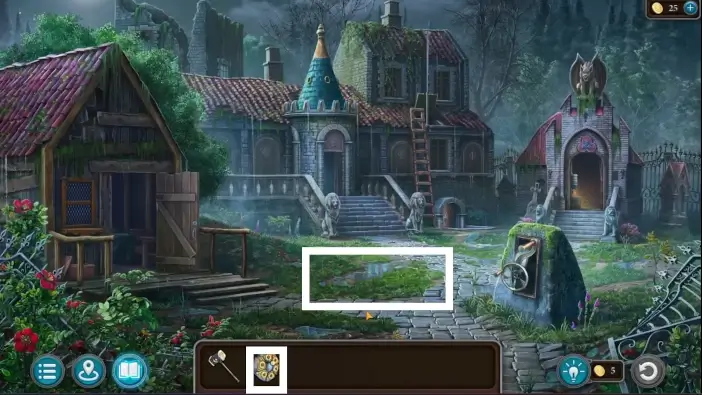
From the courtyard, approach the basement door and unlock it using the key you found in the mansion.
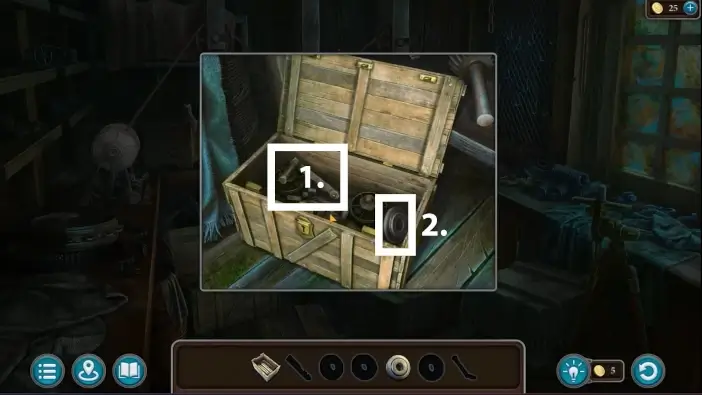
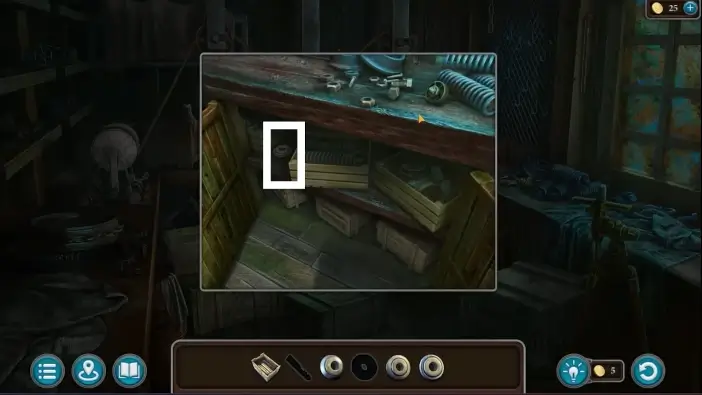
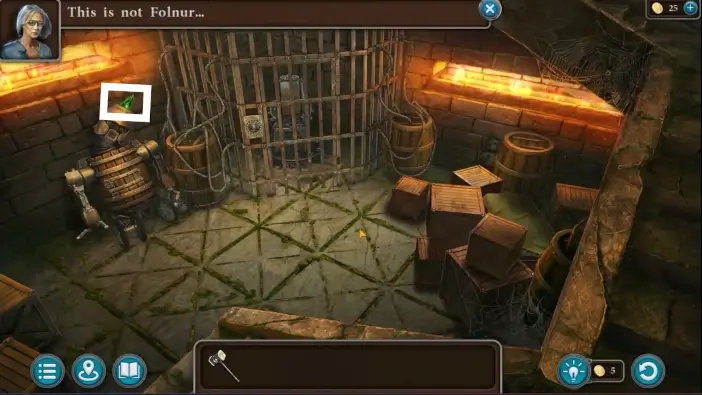
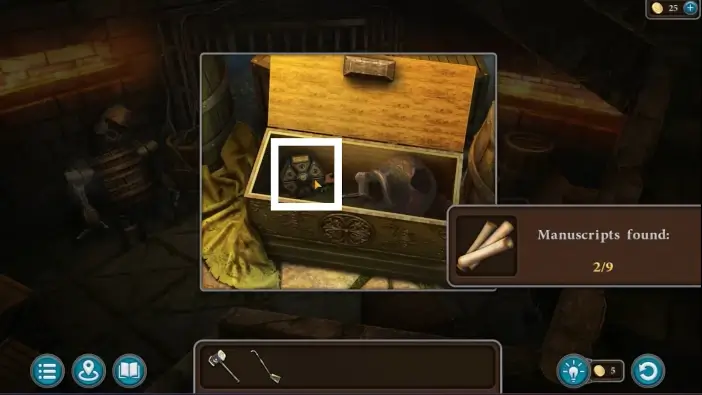
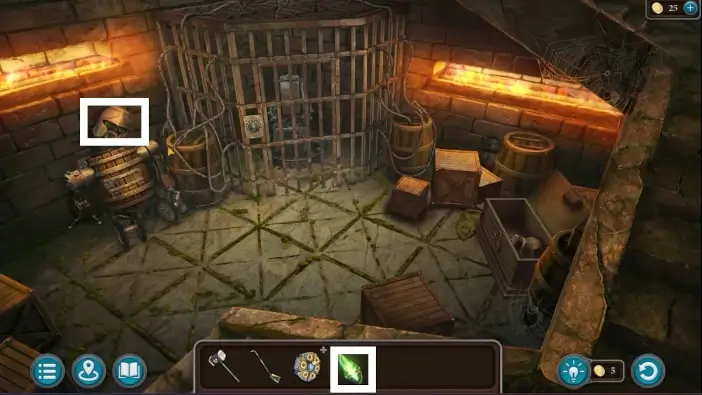
In the basement, move the boxes away to reach one specific box with items you need.
- From the box, pick up the strongbox. Susan will put the strongbox on the side. Click on the strongbox again to open it and pick up the patterned washer from it. You will need it later to unlock the trapdoor on the mansion’s roof, where Folnur’s antenna is.
- Pick the first clamp. You will need eight clamps to fix the ladder in the basement. You will use the ladder to reach the mansion’s roof.
(If you can’t click on the clamp, first click on the ladder on the ground, wait for Susan to comment that she needs eight clamps, and then return to pick the first clamp from the box)

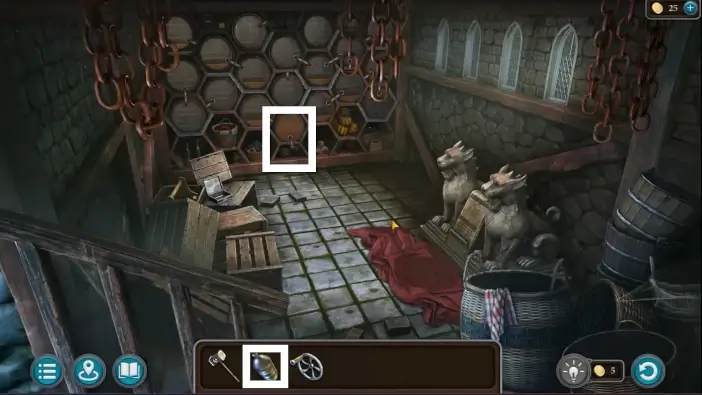
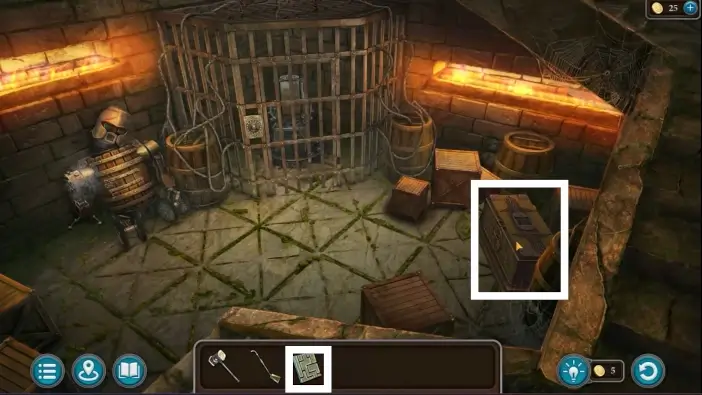
Remove the blanket from the statues on the right side of the basement. Then, approach the stone slab in the middle to start a new puzzle challenge.
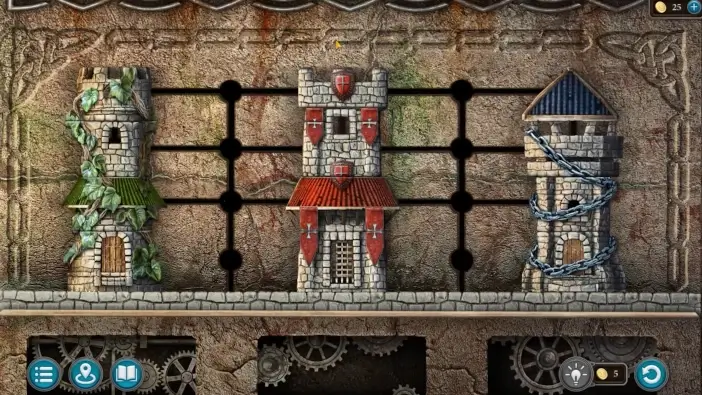
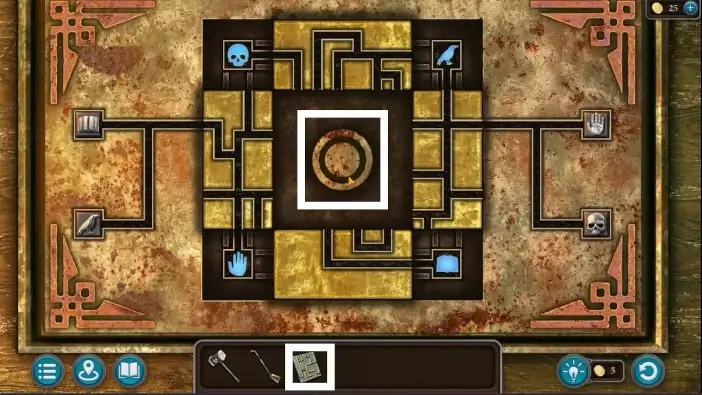
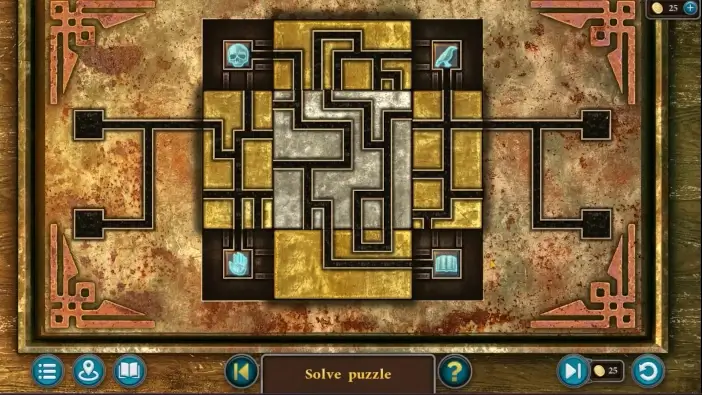
At the start of the puzzle, the fragments of each of the three towers will be mixed. You need to rebuild all three towers to contain only their pieces, like in the picture above. You can move the tower fragments along the black lines. If you complete this puzzle challenge quickly, you will get the “Connoisseur” achievement.
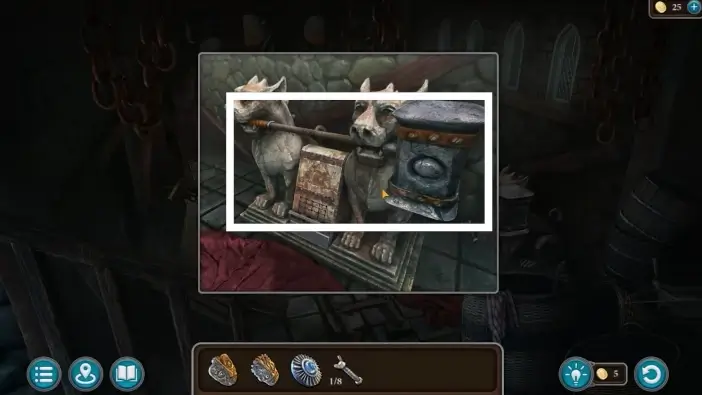
Once you solve the tower puzzle, the grip of the statues on Folnur’s hammer will weaken. Pick the hammer of Susan’s old friend Folnur.
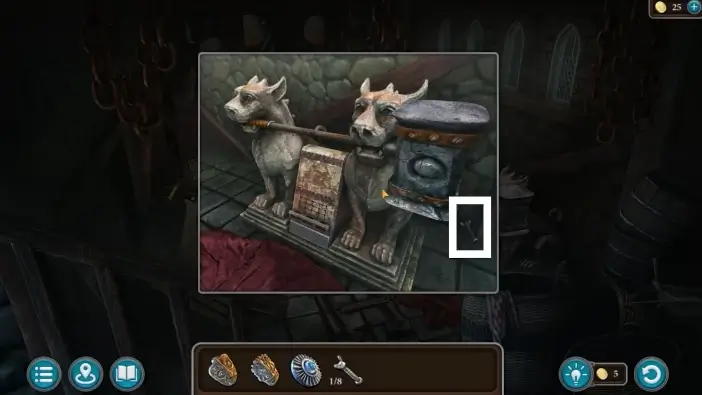
Don’t forget to pick the second clamp for the ladder. It’s on the right side of the statues.
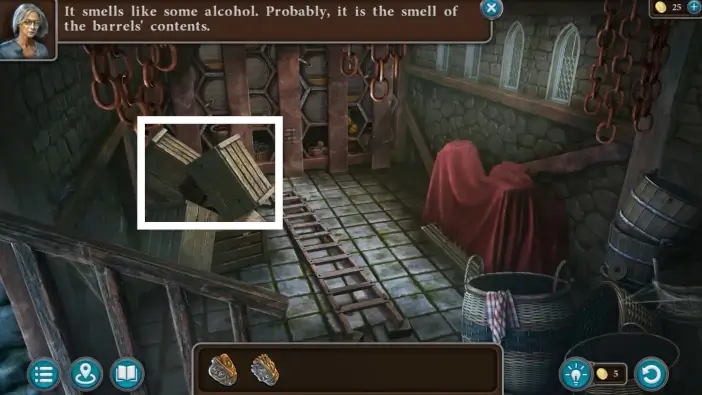
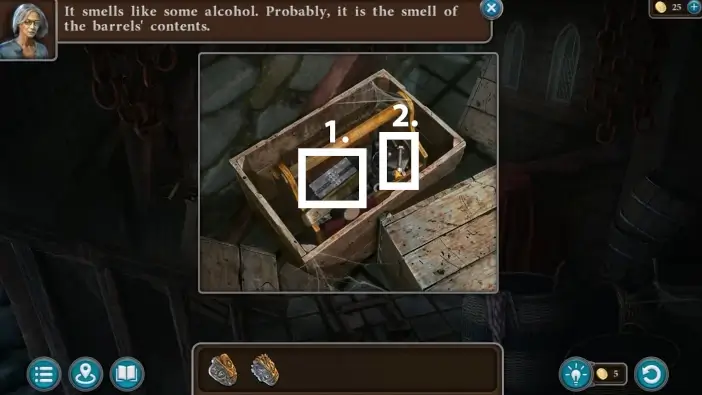
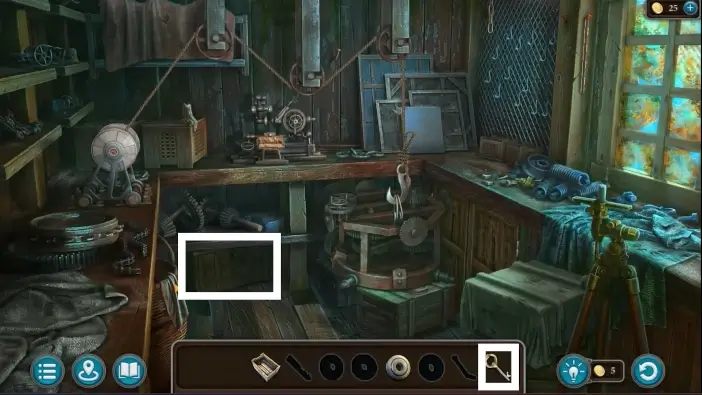
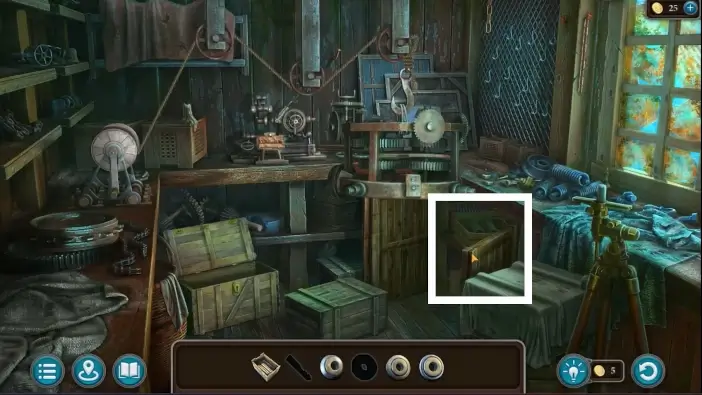
In the basement, approach the section with barrels.
- Pick the third mask.
- Pick the third clamp.
Go to the mansion and approach the keys on the ground again.
Pick two more clamps.
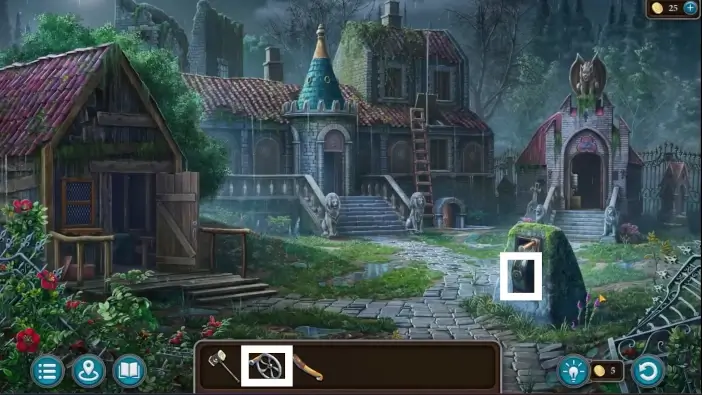
Approach the keys on the left wall.
Pick the sixth clamp.
Approach the hanging keys on the right.
Pick the seventh clamp.
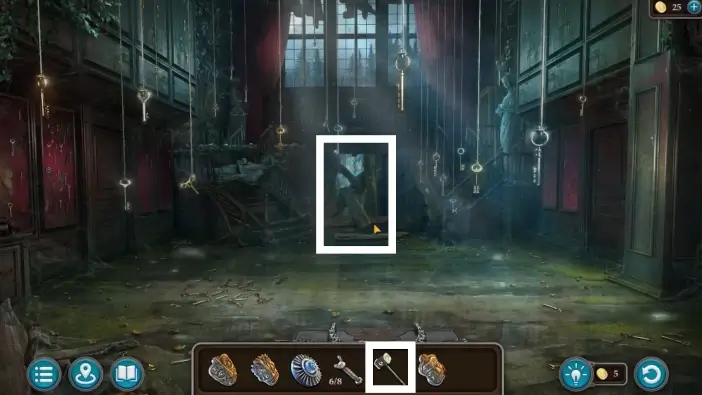
Use the Folnur’s hammer to destroy the obstacles to the living room.
When you enter the living room, Susan will meet her granddaughter Kiana. She will explain that she brought Susan to the Lost Lands and that she found out about the terrible faith of their friends Maaron and Folnur.
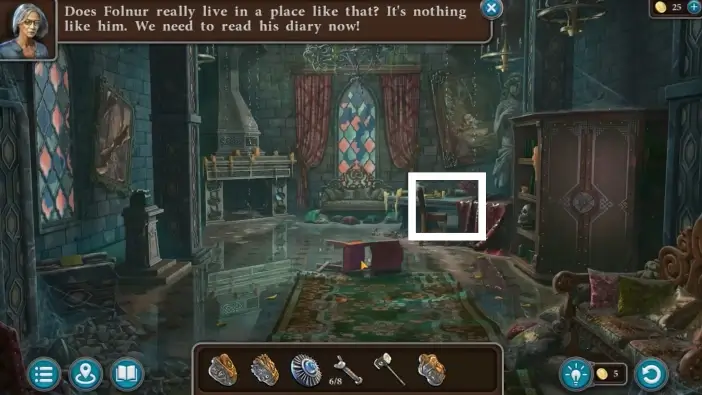
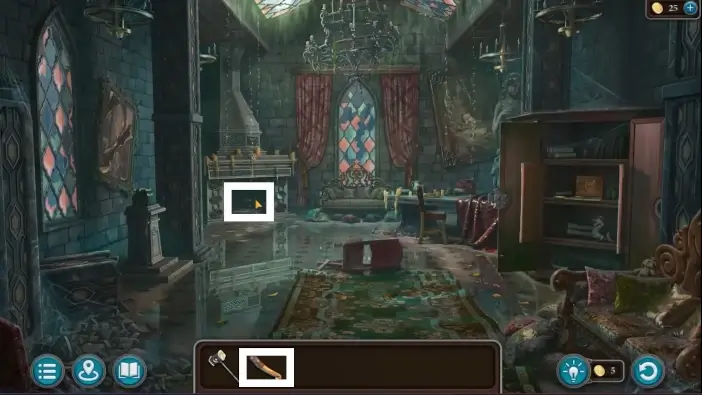
After the conversation, approach the table.
- Pick the fourth mask.
- Read the Folnur’s journal.
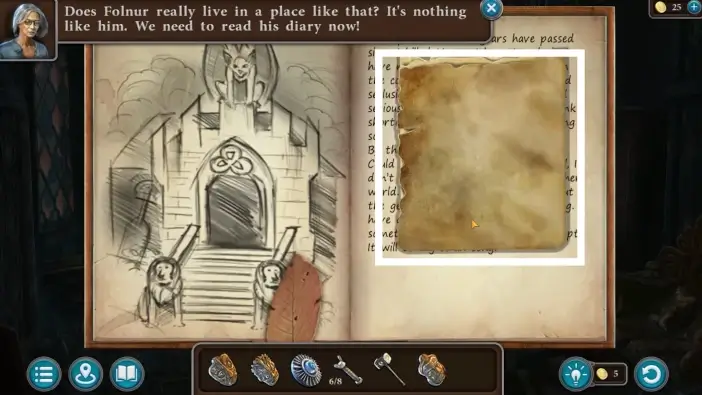
When you turn several pages you will see an insert with a picture. Pick it up. In the picture is the clue on how to solve a puzzle to unlock the cabinet in the living room.
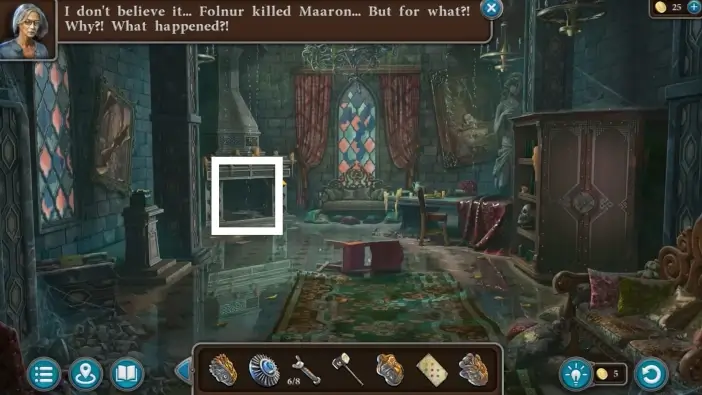
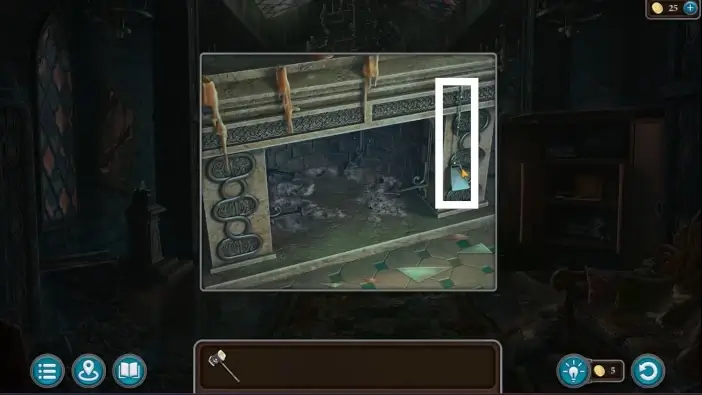
Approach the fireplace.
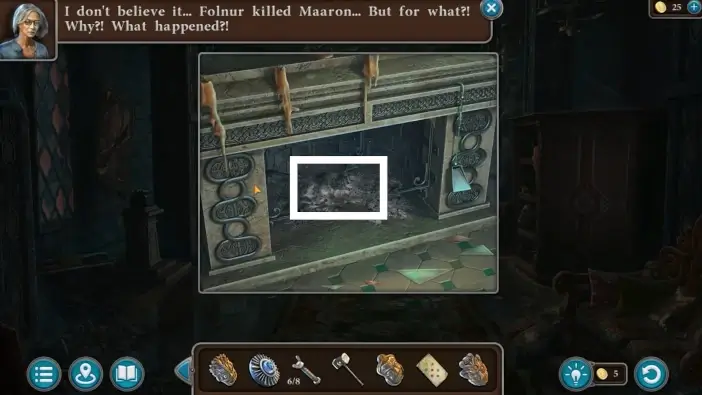
Remove some of the ashes and pick the fifth mask.
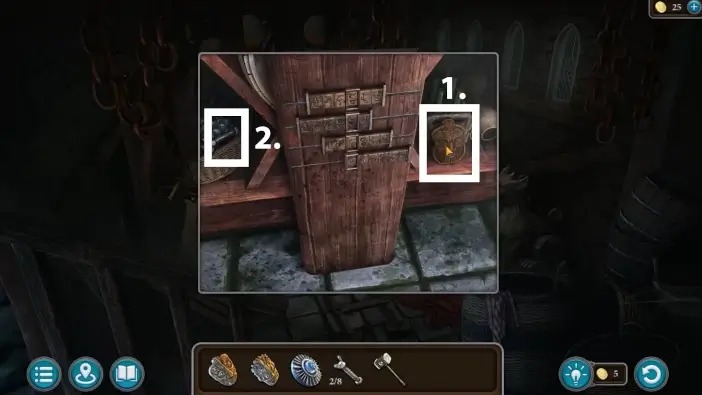
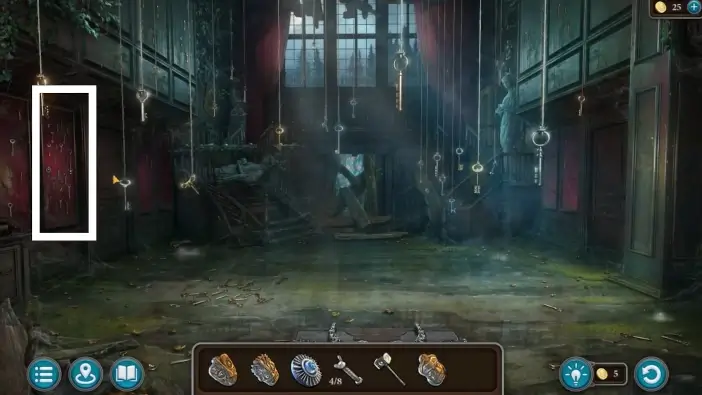
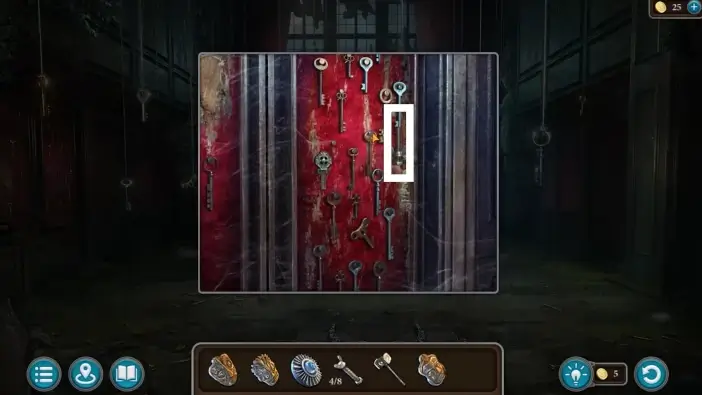
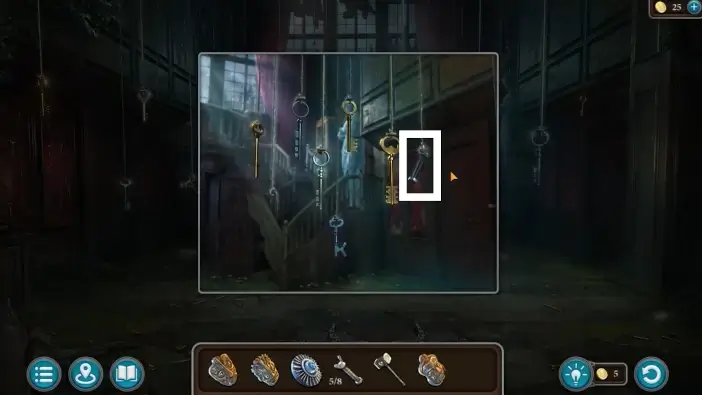
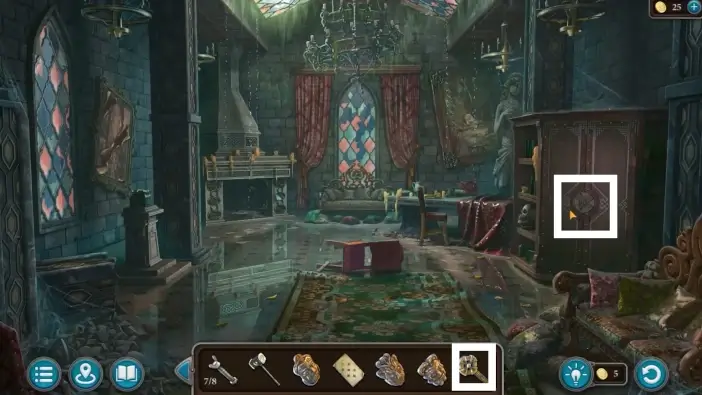
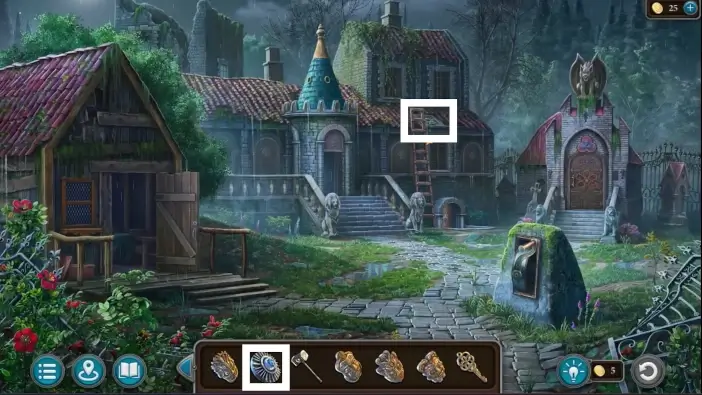
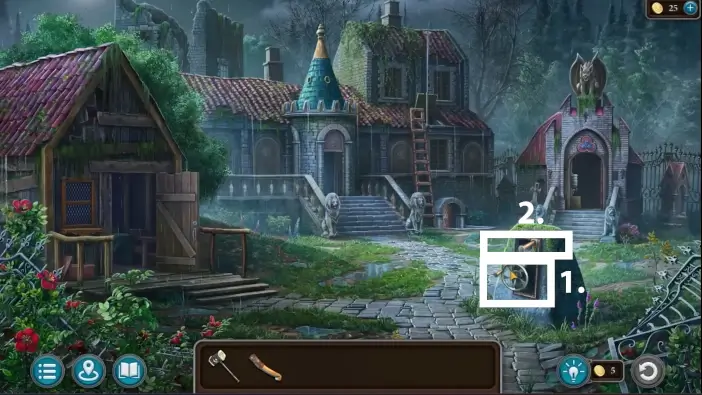
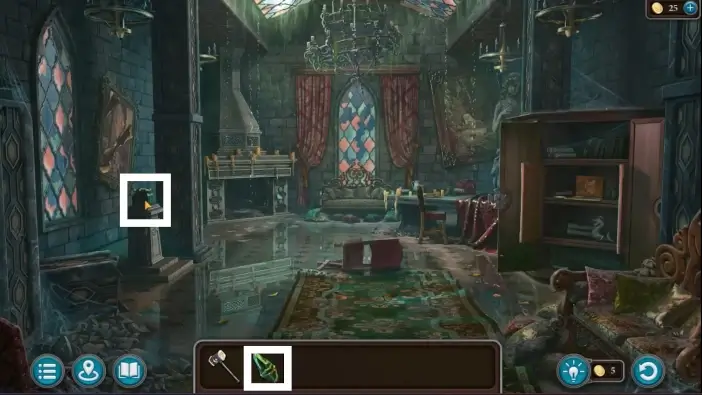
Go back to the mansion’s hallway and approach the keys on the left wall.

Pick the cabinet key, marked in the picture above.
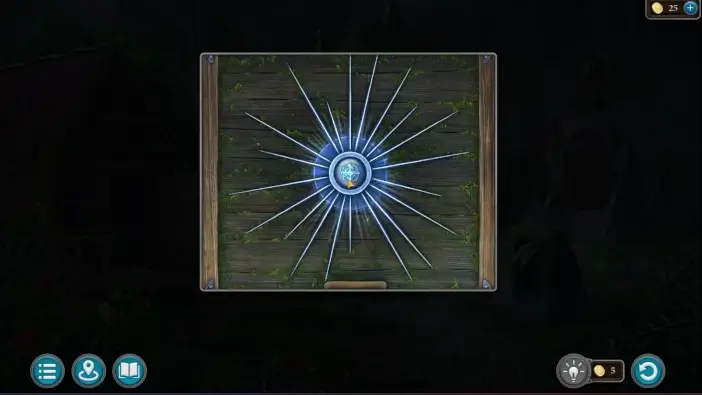
Use the cabinet key to start a new puzzle challenge.

Place the “insert with a picture” item on the puzzle and follow the clues. You need to place the animals on the circles in the same order as in the clue. You can move the animals by clicking on the rotation buttons. When you click the button, the three animals surrounding the button will change their positions clockwise.

- In the cabinet, read about the Folnur’s fireplace electric igniter. You will need later to ignite the fireplace with the antenna from the roof.
- Pick the eighth clamp that was below the paper.
- Remove the frame and take the rag that has a drawing on it. It is a design for a crypt key and you will use it in the workshop.
- Below the Manuscript collectible is the sixth mask. As for Manuscripts, this guide won’t show the locations of collectibles. For collectible locations, visit our special post here!

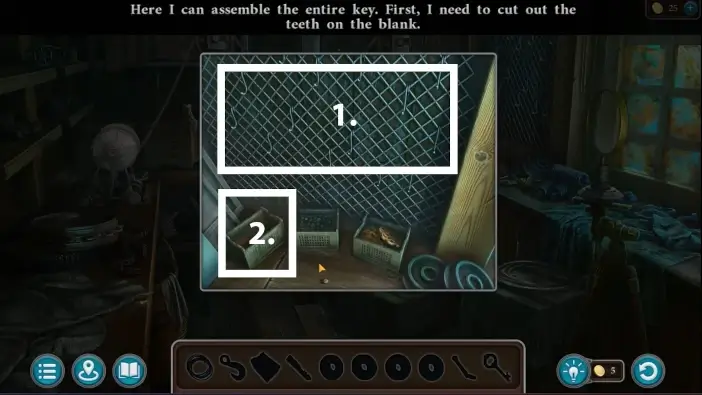
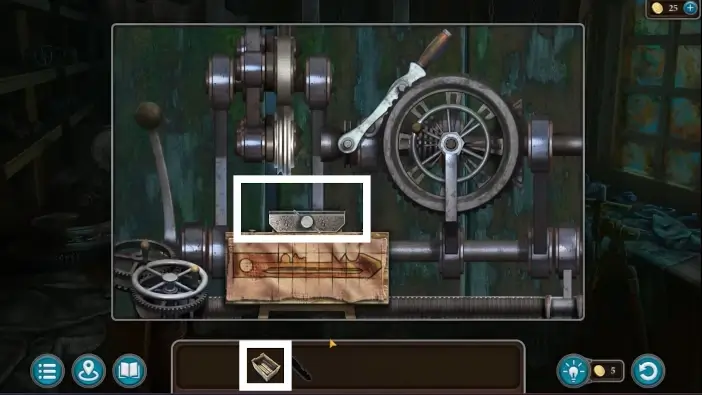
Go to the workshop and place the “rag with a drawing” item on the key-making machine.
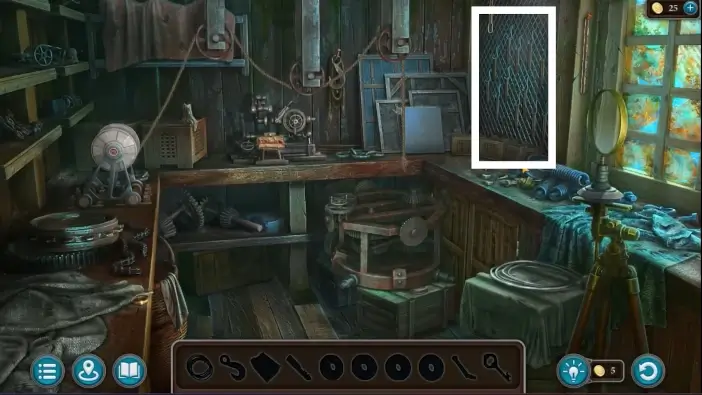
The new puzzle challenge will begin. In this type of puzzle, you need to find all the items in the room to reach the final goal item. These temporary items won’t go to your inventory and they are limited only to the puzzle.
Approach the right wall.
- Pick the key blanks hanging on the wall. They will go inside the box.
- Pick up the box full of blanks.
- Remove the mirror so you can access the mechanical part below it.
- Take the first cutter.
- Pick up the wire.
- Take the hook from the wall.
- Place the hook on the wall.
- Place the wire on the hook.
- Take the key on the left.
Pull out the chest from beneath the table and use the key you just picked to open it.
- Pick up the winch lever.
- Pick up the second cutter.
- Attach the winch lever and activate the lever so that the hook can lift up the machine from the box.
- Pick the third cutter from the box.
Move the boxes and open the cabinet.
Find the fourth cutter.
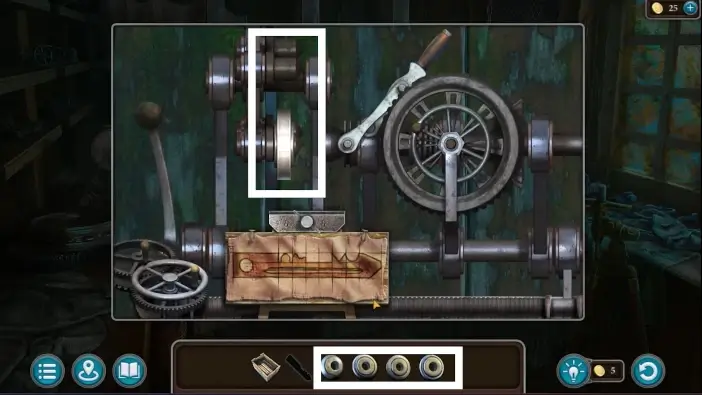
Approach the key-making machine where you left the rag previously. Place all the cutters on the machine.
Place the set of blank keys.
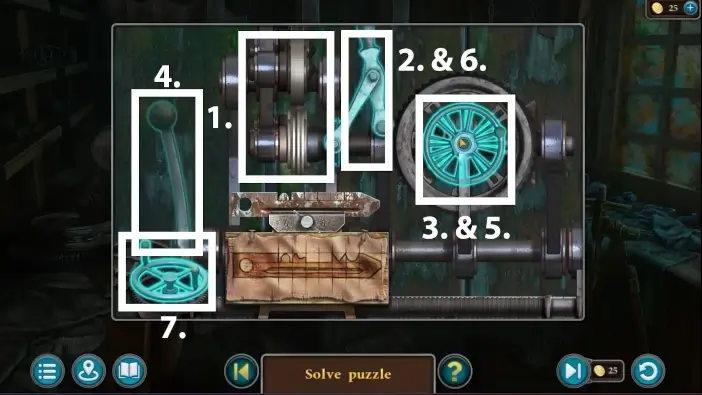
Next, you’ll need to create a key that has the same pattern as on the rag.
- You can change the cutter by clicking on it. Pay attention to the shape of the cutter and shape the key blank to look exactly like the picture on the rag.
- Use the connector to connect the cutter with the wheel on the right side.
- Rotate the wheel to activate the cutter.
- Pull the lever to lower down the cutter and start shaping the key blank.
- If you want to change the cutter, stop the wheel.
- Detach the connector from the cutter.
- When you want to move the machine to the next segment of the key blank, use the valve in the lower-left corner.

If you complete this puzzle quickly, you will get the “Clever” achievement.
Pick up the bit of the future key you just made.
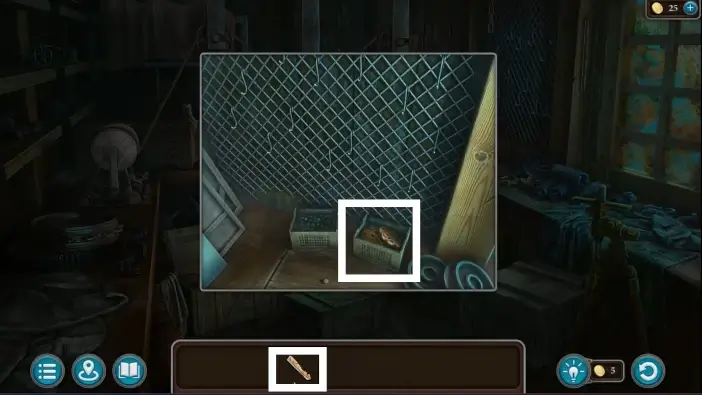
Approach the boxes on the right and attach the key handle with the key bit to get the final product. Take the finalized key. You will use it for the crypt door.
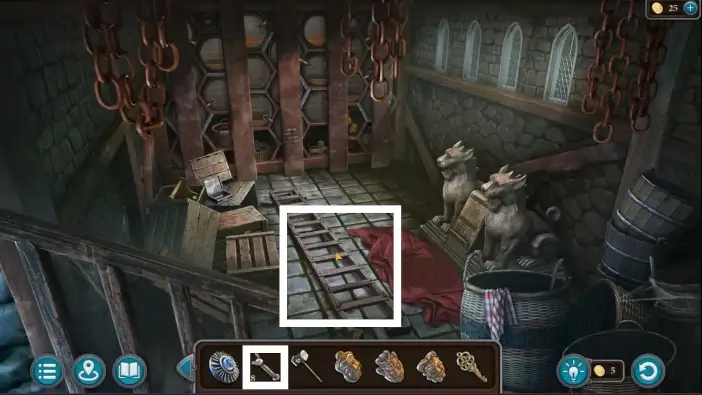
Go to the basement and fasten the ladder with the eight clamps you collected, then pick up the ladder.
Go outside the mansion and place the ladder on the wall.
Approach the trapdoor where the antenna is. Use the patterned washer to start a new puzzle challenge.
Rotate the patterned washer so that the lines from the patterned washer match the lines from the trapdoor, like in the picture above.
Examine the antenna. To use it, it needs to be extended upward first.
- Outside of the mansion, use the lever on the right to extend the Folnur’s antenna (if you can’t click the lever, examine the antenna first).
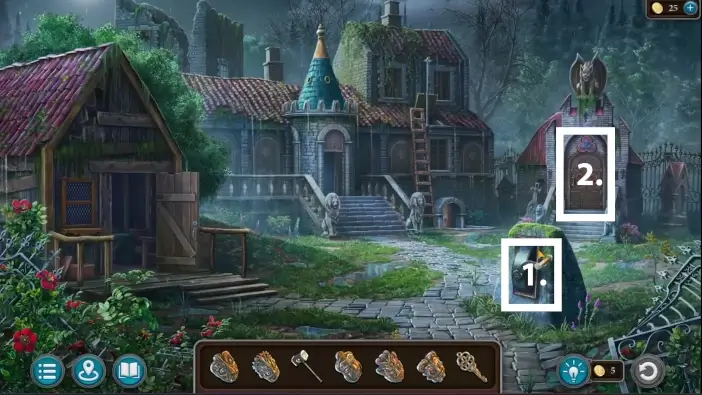
- Approach the door to the crypt and place all six masks you acquired so far.
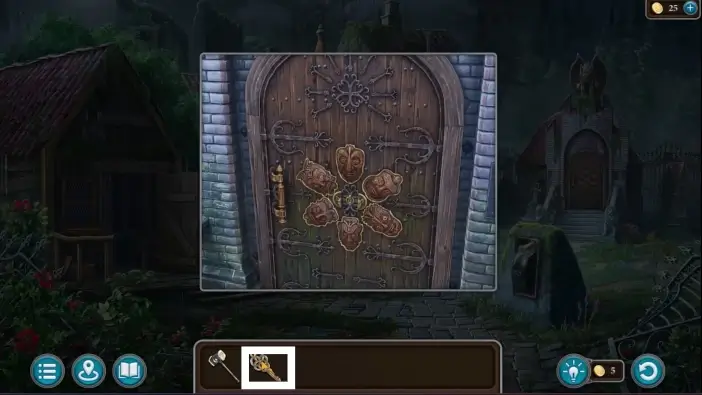
After you place all the masks, use the key you made in the workshop to unlock the door.

- Unfasten the fuel tank.
- Take the fuel tank. You will fill it with alcohol from the barrels in the basement.
- Take the valve. You will need it to attach it to the mechanism outside of the mansion. That mechanism controls the antenna.
After all these steps, memorize the symbols on the wall. It is a solution for the puzzle near the barrels.
Go to the basement and approach the symbols near the barrels.
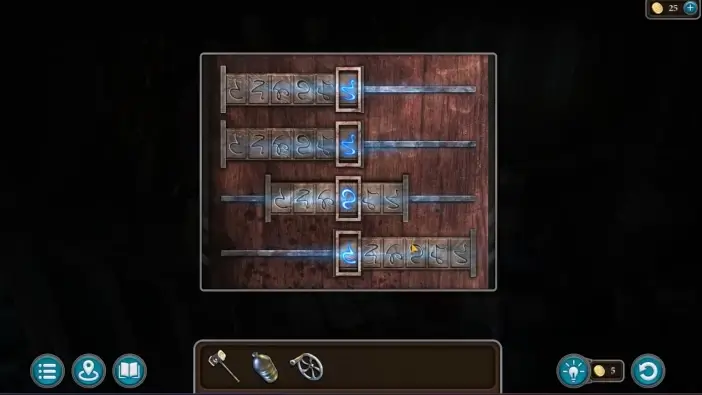
Place the sigils so that the order from top to button is identical to the order from left to right that you saw on the wall in the crypt. When you finish, the obstacles in front of the barrels will be removed and you can approach the barrels.
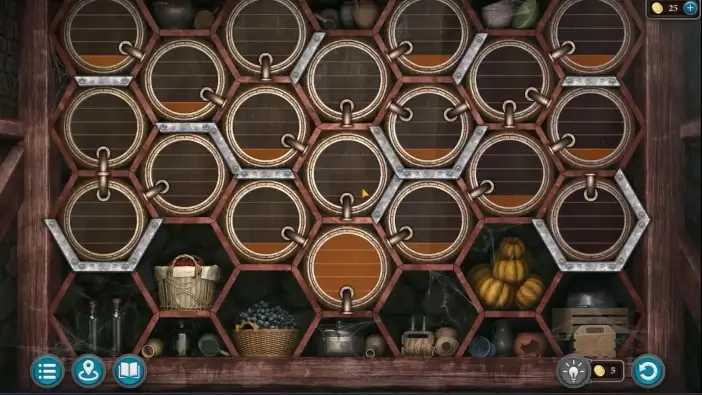
When you approach the barrels, a new puzzle will await you. You need to fill up the bottom-most barrel with alcohol from other barrels. You can rotate any barrel. To transfer the alcohol from one barrel to the other, their faucets should be connected. The alcohol will automatically fall to the lower barrel.
After you complete the previous puzzle, fill the tank with the alcohol from the barrel.
Go to the crypt and place the tank full of flammable liquid.
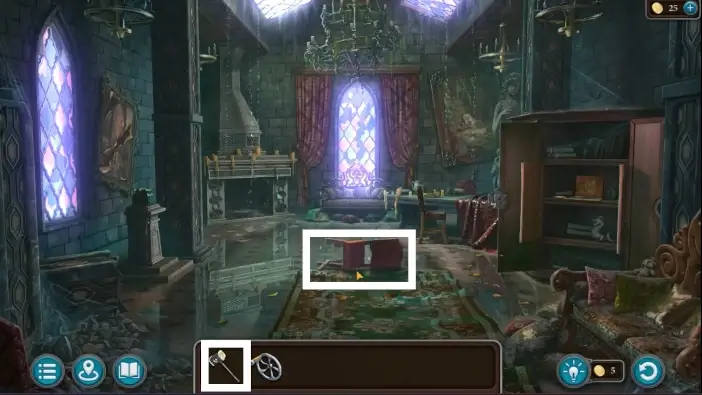
Go to the mansion’s living room. Use the Folnur’s hammer on the chair.
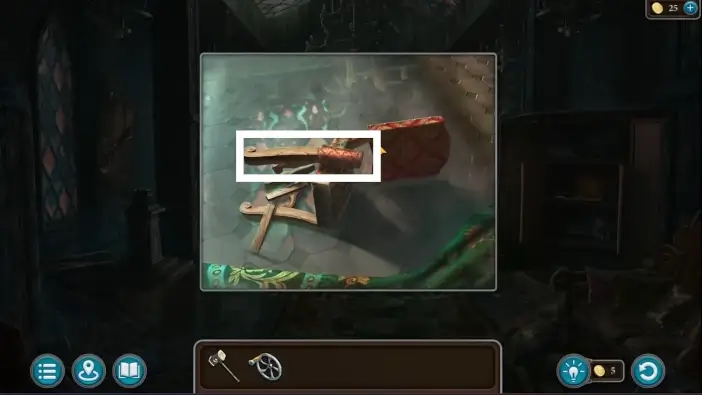
Hit the chair’s leg. Take the leg. It will serve as a torch.
Return to the crypt and pour the flammable liquid on the torch (chair’s leg). You’ll need light to go deeper down the crypt because it’s too dark.
Go to the mansion’s courtyard. Place the valve from the crypt on the mechanism for the antenna.
- Rotate the valve to lift the ball of the antenna.
- Press the lever for the antenna to attract the lightning strike. As predicted in the Folnur’s notes, this will ignite the fireplace.
Go to the fireplace in the living room. Place the alcohol-soaked torch inside the fireplace. The Kiana will activate the antenna again and you will get the burning torch.
Use the burning torch to burn the alcohol. This will illuminate the corridor and the staircase. Go downstairs, deeper into the crypt.
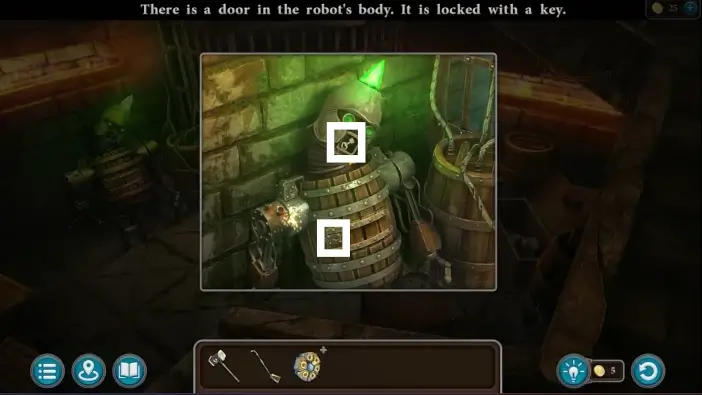
Take the shimmering crystal from the robot’s head. You need to recharge it to activate the robot.
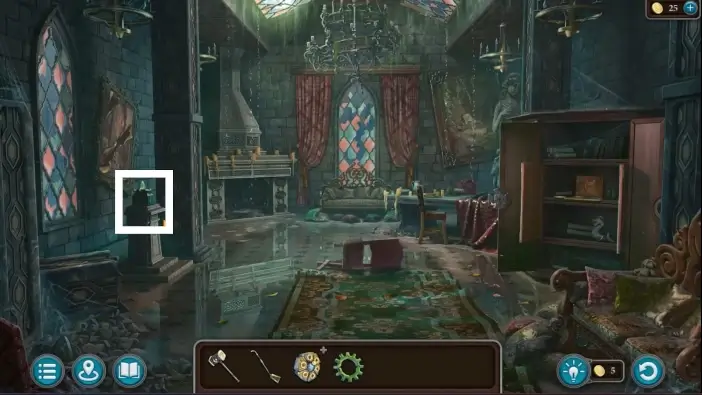
Go to the mansion’s living room. Place the shimmering crystal inside the mysterious box. You will recharge the crystal with this box, but first, you need more components for it.
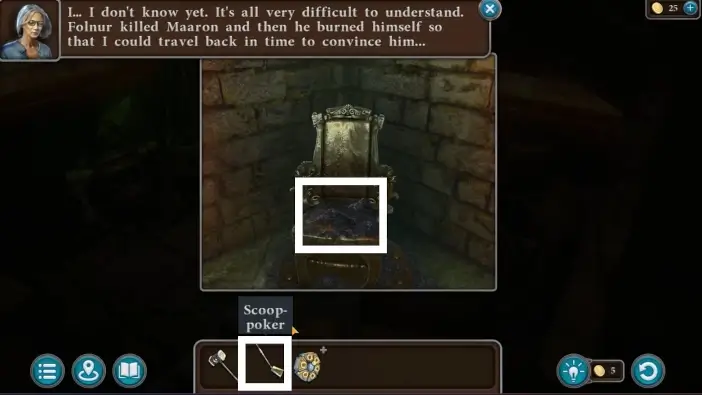
Approach the fireplace. Pick the scoop-poker.
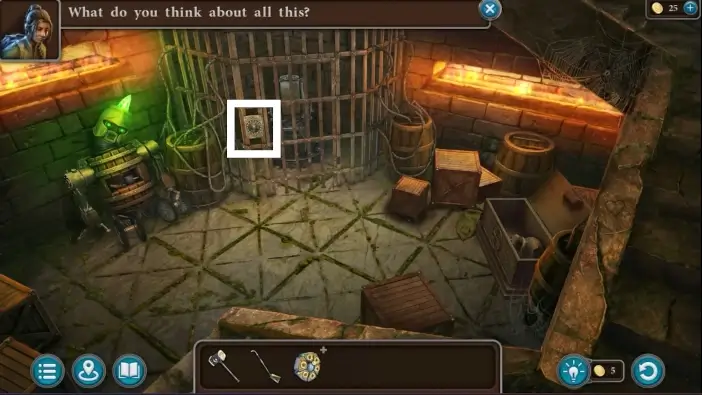
Return to the crypt. Use the scoop-poker to reach the chair behind the bars and get the part of a medallion.
Remove the boxes until you see a chest. Approach it.
Place the part of a medallion on the central slot to start a new puzzle challenge.
Move the grey icons along the black lines and place them in the corresponding fields that have the same icons. You can also move the yellow parts to create different pathways.
Once you solve the puzzle, the chest will open. Remove the broken vase and pick the Hexagon of Time.
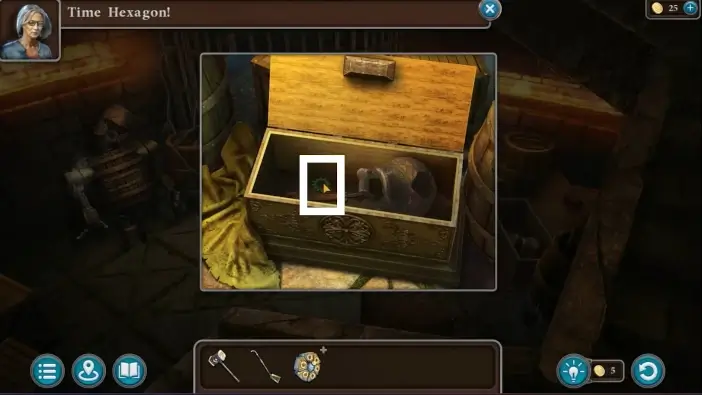
Below the Hexagon of Time is the energy core. Pick it up as well.
Return to the mysterious box in the mansion’s living room.
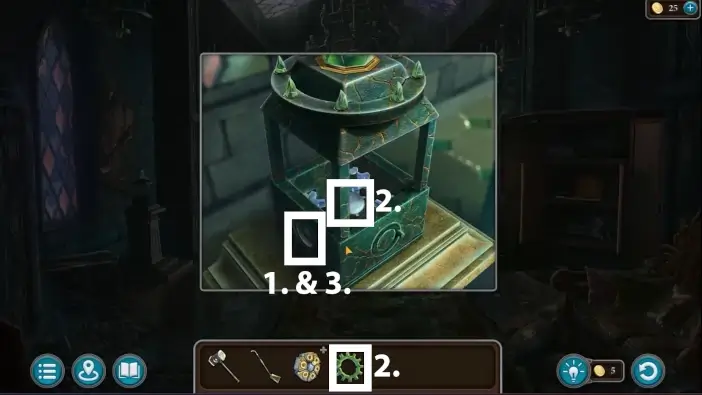
- Press the button on the left side of the box to open the box.
- Place the energy core inside the box.
- Press the button on the left again to close the box. The crystal will start recharging.

Take the charged crystal.
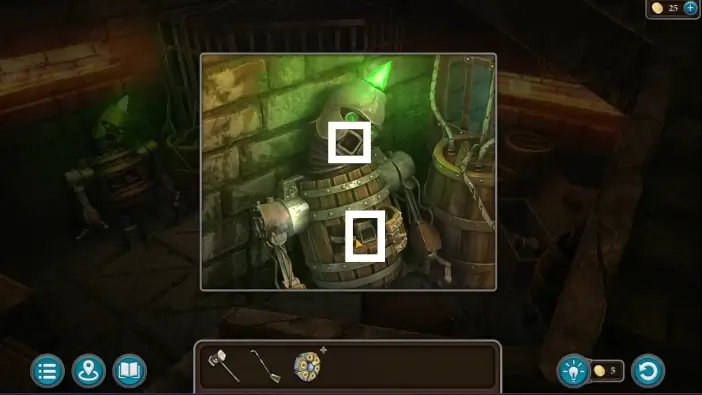
Return to the crypt and place the charged crystal on the robot’s head.
Open the small compartment in the robot’s mouth and take the key. Use that key to unlock and open the robot’s chest.
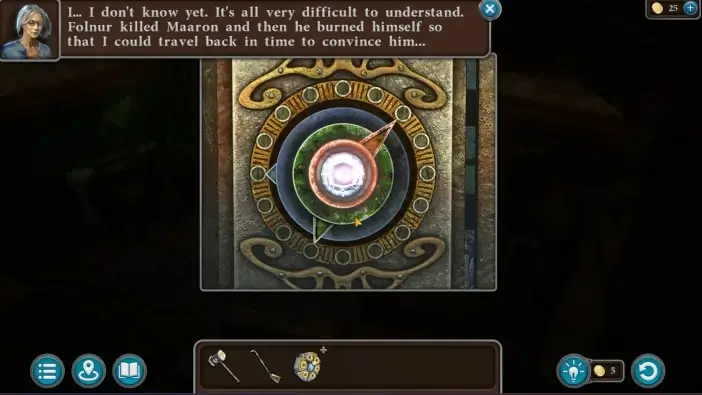
You will see a speaker inside the robot’s chest. Place the speaker inside the robot’s mouth. The cutscene will start, and the robot will speak Folnur’s last words. You will find out that Folnur murdered his and Susan’s friend Maaron and someone influenced him to do so, but he can’t remember. At the end of his life, he wants to set things right. He’ll inform Susan to use a Hexagon of Time and the ashes of his body to go back in time and prevent his evil deeds.
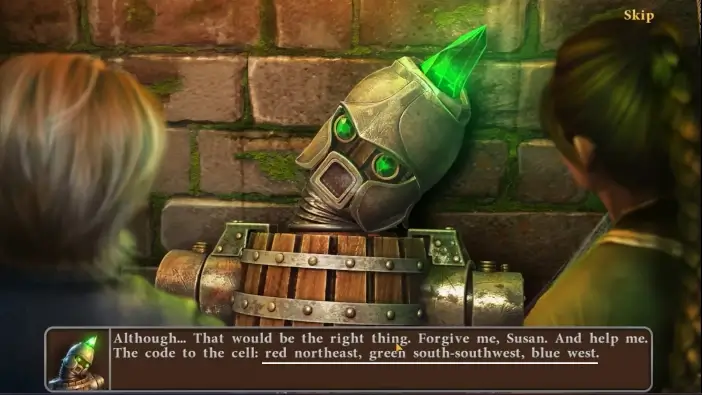
During the cutscene, pay attention to the code for unlocking the cell: red northeast, green south-southwest, and blue west.
Approach the lock of the cell.
Place the arrows of different colors in different directions of the world, according to the clue the robot gave.
Go inside the cell and use the scoop-poker to take the Folnur’s ashes.
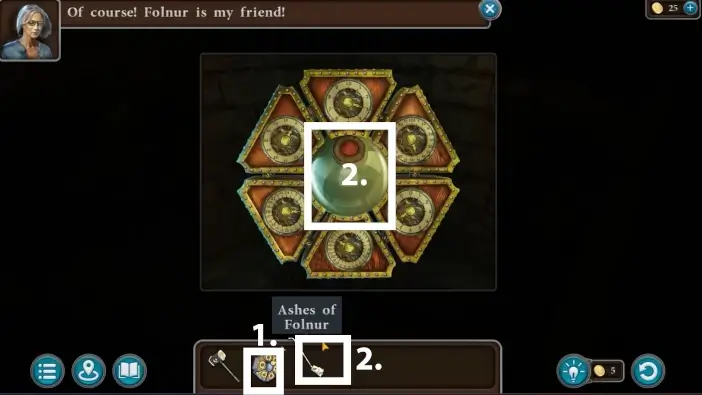
- In your inventory, click on the Hexagon of Time to examine it.
- Place the Folnur’s ashes inside the Hexagon of Time.
Activate the Hexagon of Time at the mansion’s courtyard to go back to the past when Folnur and Maaron were still alive.
This will mark the end of part 1 of our guide for the Main Chapter of the Lost Lands 10. In the next part, you will find yourself in the past and you will start searching for answers to all mysteries.
Thank you for reading!